
Welcome to my Harry Potter Farmhouse Chic classroom!

Before I get into the nitty gritty, I want to remind all of my readers that your classroom DOES NOT have to be "Pinterest worthy". Your classroom is your space and you can do as much or as little as you want! It doesn't have to look like everyone else's! Have YOUR personality shine through!
------------------------------------------------------------------------------------
Alright, are you all ready for some deets?! Here we go!
I knew I wanted to incorporate Harry Potter into my classroom but I was also obsessed with everything farmhouse! I mean, who isn't? Thank goodness for Ashley from @buldingbooklove & her classroom design challenge. I wouldn't have been able to visualize what I wanted without her guidance.

Here is my original mood board!
I wanted moody colors but done in a way that still made the classroom feel light and airy. Anything that was going to be a larger piece I kept it on the lighter end of the color spectrum, which brings us to....
Step One: covering my ugly walls


As you can see, I have an extremely large room! I am able to do a lot in here and I am VERY fortunate to have this space!


Please excuse the blurry photos! I wanted to show you the process of hanging up the bulletin board paper. All of my walls, besides one, are drywall enabling me the ability to staple everything! It is very convenient and easy to hang anything! Now, I know most classrooms are made of cement. Don't worry, I have a solution for you! Frog Tape will solve all of your problems! It is a fancy painter's tape that withstands humidity. Being a teacher in Minnesota, I know first hand how much climate change can affect our walls! Many of my co-workers use Frog Tape & swear by it!
How much paper did I use? First, I always purchase the largest roll. (48 x 12)
Shiplap Paper = 2 rolls
Brick paper = 2.25 rolls
I found mine at Lakeshore Learning Center for $14.99 a pop. You might be thinking...."WHAT! THAT'S TOO EXPENSIVE!!" FYI, I only purchase bulletin board paper when it's on sale. I paid a total of $35.
Installation Tip: Cut up the paper in smaller pieces. It's much easier to attach! What's awesome about this paper is that no matter where you cut it, it will always match up!
I know many of you have rules that go against you being able to cover all of your walls. My advice for you is to create one area in your classroom that you can customize & make it your own!


Step Two: set up my library


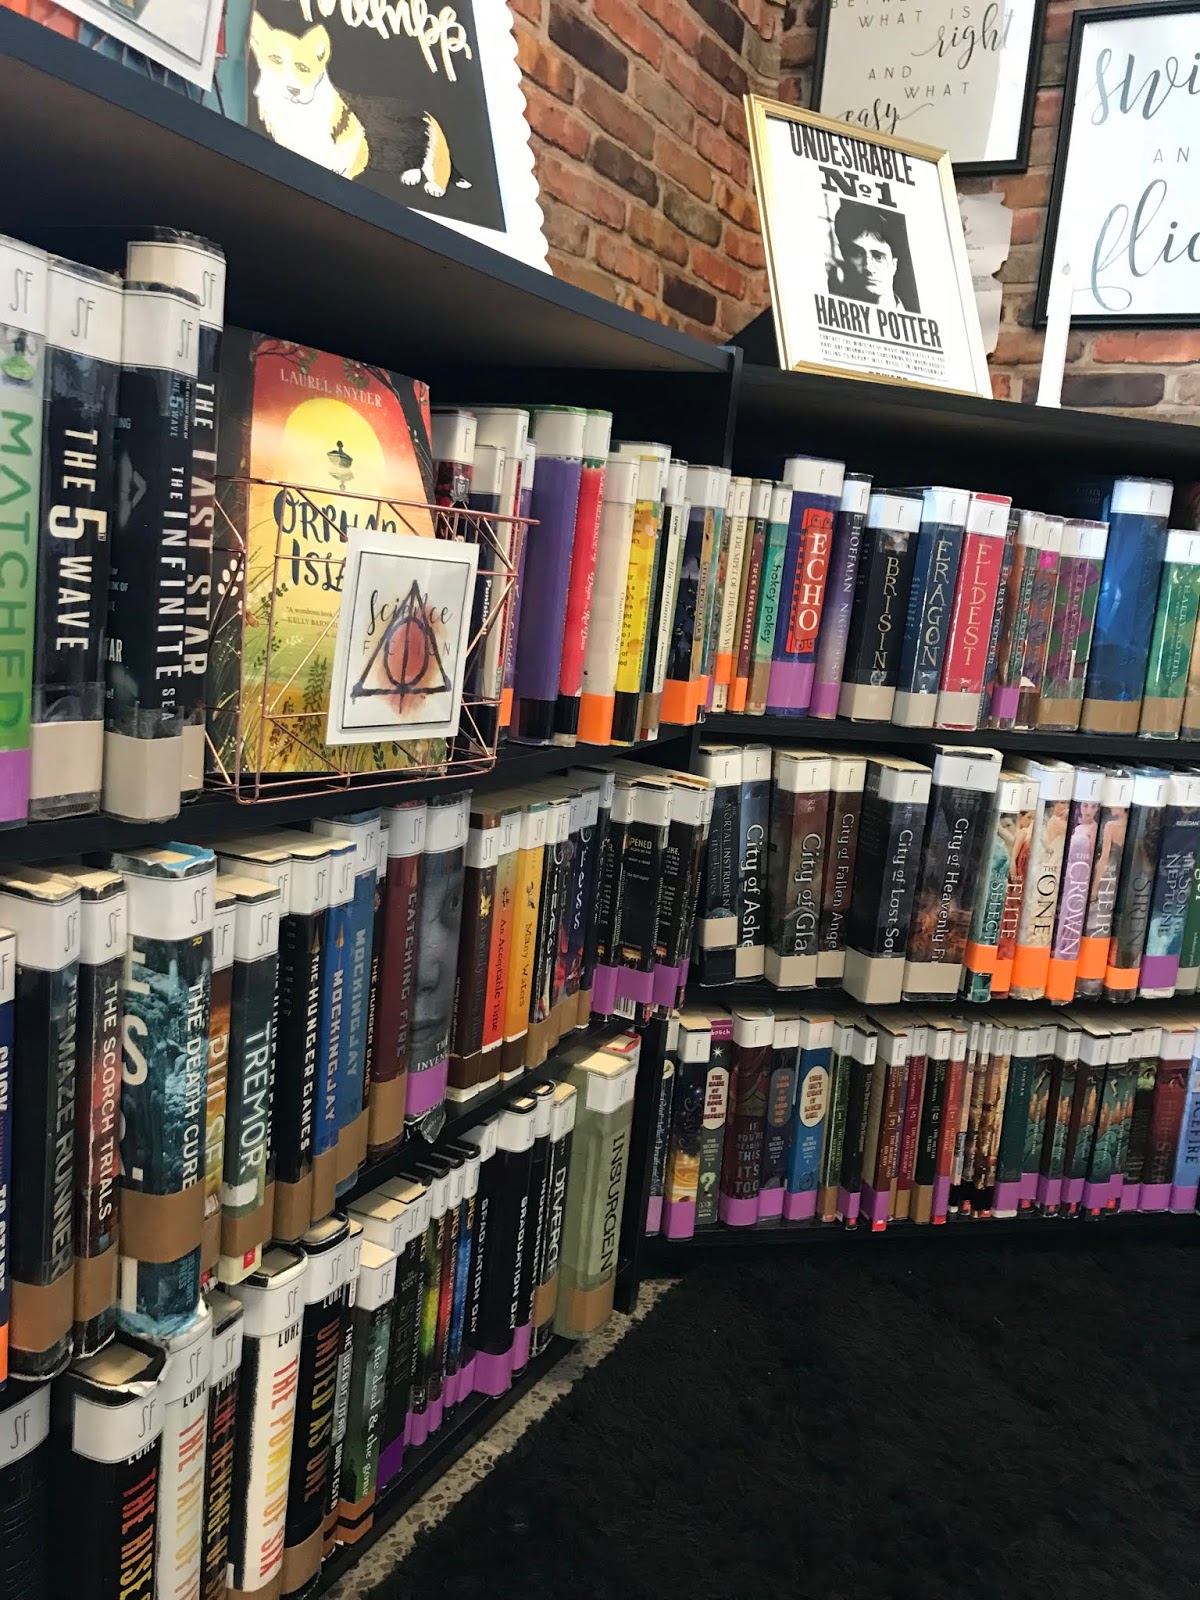


For me, the first thing I do is put together my library. It is the heart of my classroom and I want to make sure it is perfect and well organized! This is the spot in my classroom where I want my students to spend the most time in!
This is where I started my Harry Potter Design. Everything you see in the collage is attached to my drywall. I am able to hang it all up with tacks! All frames and mirrors are from the Dollar Tree. I created my quote posters in ppt with these two fonts. Nostalgia & Green. Both are from Etsy! You will see these two fonts through my ENTIRE room! Everything else you see I found for free on Google! When in doubt, make it yourself!
Signage:
-Hogwarts Acceptance Letter
-"Swish and Flick" (made in ppt)
-"We must all face the choice between what is right and what is easy" (made in ppt)
Library Organization:
My entire library is organized by genre/student interest. Confession--I used to organize my entire library by levels. I've seen first hand how that system affects a student. There is nothing worse than when someone or something tells you cannot read a book because "it's not in your level". I want my library to promote reading and it starts with all students being able to choose whatever book their little heart desires! You will notice colored bands around each book spine. Those are apart of our reading intervention program called American Reading. Yes, that is a leveling system. What is really great about American Reading's leveling system is that it takes into account vocabulary & content. Although I try to read most of the books in my library, I cannot possibly read them all! The colors are their to help me see what might be inside each book. My students have no idea what the colors mean and I will always keep it that way! Great example of the effectiveness of American Reading's leveling system is this example!
"Thirteen Reasons Why" is labeled as a 3.9 (3rd grade, 9th month) by Accelerated Reader versus a purple (6th grade level) by American Reading. I'm sorry, but NO 3rd GRADER SHOULD BE READING "THIRTEEN REASONS WHY"!
Anywho, I could talk about the classroom library for days so I'm going to stop myself there!
Design Elements You See:
-Wired bins are from Target Dollar Spot--last season
-Tall plastic bins are from The Container Store (Size M)
Step Three: Bulletin Boards


In years past, I have used bulletin boards for more "pretty" displays versus purposeful displays. This year, I wanted to use EVERY SINGLE INCH of my classroom & this started with me changing up my bulletin boards.
+Interactive grammar board- I use @thehungryteacher5th's mentor sentences. If you are a middle school teacher and wanting to change they way you teach grammar, Martina's TpT product is a MUST!
Over 77% of my school is identified as ESL. Grammar can already be quite tricky for many of my students and I wanted to add to my already awesome grammar instruction. This is where @hello_fifth's interactive grammar board comes in! Student's will be able to interact, discuss, & dissect our weekly sentence & I cannot wait to see this in action!
+Anchor Chart Central: You will notice that I have 3 different spots for anchor charts. One will be used for math and the others are for reading and writing. I always create anchor charts for every lesson. They are a great resource for students to use when they become stuck while completing independent work.
-Black paper is from Lakeshore
-Curtain rods are from Walmart (silver finish)
-Hung curtain rods with hook command strips. I secure the area by stapling around the command strip and coloring over the staple with black permanent marker to camouflage it. I attached the anchor chart to the rods by using this!
-Magnolia garland is originally from TJ Maxx & I found it on clearance for $17! Here is a great substitute from Hobby Lobby. I have this by my calendar. There is always a coupon for Hobby Lobby and I paid about $7.50 for it!
TIP: Use your phone as a leveler! If you swipe left on the compass app, it turns into a leveler! This is how I kept everything straight!
Step Four: Adding fun Harry Potter elements


Keeping with the farmhouse theme as my base, I implemented different elements to tie in Harry Potter.
Classroom Norms: These are based off of Ron Clark's "Essential 55". This is my second year doing them and I will never go back! Obviously, I had to redesign them to match my theme...this is where the educational decree design comes in! It was so much fun redesigning my norms that I think I will keep them this way for years to come! This display was super inexpensive too. I spent a total about of $13. All frames can be found at the Dollar Tree. Don't be afraid to mix and match the frames!
Floating Candles: THEY WERE MUST! I created my own for my Harry Potter room transformation, but I wanted to step up my game. I purchased these remote controlled candles from Amazon! Used hot glue to attach the fishing line & attached the fishing line to the ceiling with a tack! Place the candles are different levels. This will help create the look you see in the movies.
Floating Letters: They were much easier to make than you think. All you need it brown craft paper, a printer, fishing line, two wooden rods, & tape! I will be doing a separate blog post with a step-by-step tutorial on how to create these yourself!
Large Farmhouse Harry Potter Quote: Using the fonts I listed above, I used my Cricut to cut out all of the letters. It took me about 2 hours to get them all done, but it was well worth it! I used a glue stick to attach each letter to the bulletin board paper. You will also notice book pages! I recycled one of my old "Harry Potter and the Sorcerer's Stone" and began gluing chapters 1-7. I did this BEFORE I did the second half of the quote!
TIP: Always walk back from a large design to make sure you can see the big picture pan out! Make sure each line is straight and you like where the design is going!

I think that's everything! I'm so in love with my classroom this year. I still can't believe how well everything turned out. Thank you all for your love & support during this process. You made it more fun! Remember, you can create a space you love too!
Hi!! I LOVE your theme/bulletin boards, and I am closely following the same thing for my class. I’m also interested in the Interactive Grammar Board and mentor sentences. How did you do that every day? How did you structure it? Can you elaborate on your interactive grammar process? Thanks so much!! -Scott shilliard36@gmail.com
ReplyDelete